

Sweet Snow Along 2 - Simple One Piece Designs
Posted by Wanda Milankov on
The goal this week is to assemble 8 simple one piece designs.
You will need:
- patterns 1, 14, 16, 22, 23, 29, 30 and 35
- 8 - 8½" fabric squares of White Vintage Ads
- Ginger Snap Sugary Snow Dots fabric
- Yellow Painter's Baby Buttons fabric
- Charcoal Hand Painted Gingham fabric
- Black Sugary Snow Dots fabric
- Fusible web - EZ Steam® or Steam-A Seam II Lite®
- fine permanent marker or pen
- paper scissors
- fabric scissors
- 10" piece of parchment paper or a non-stick pressing sheet
- Iron and pressing surface
Products shown in blue are available at thimbles & things - Orillia, ON, Threads That Bind - Maxwell, ON or your local quilt shop.
Designs 1, 14 and 22
Using your paper scissors, cut a chunk of fusible web a little larger than the design. Place the shiny side (EZ Steam® ) or grid side (Steam-A Seam® ) up, on the pattern page so that all of the design is under it. Trace the design. If you can see the pattern through the paper, great! Trace. But if the pattern is hard to see, a window or light table will help.


With a dry iron, press the fusible to the wrong side of the fabric. If you are using Steam-A Seam®, before pressing, peel away the paper from the side with no tracing.
When the piece is totally cool, cut out the design and peel away the paper from the fusible, (a layer of glue will remain on the fabric).

Position the design on a background square.
Place a sheet of parchment paper over the block and press with a dry iron. The parchment distributes the heat and keeps your iron clean.
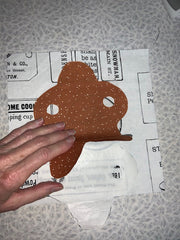
Design 16 (Mittens)
This is a simple design as well, but in order to use our fabric efficiently, from the Charcoal Hand Painted Gingham fabric we need to cut the mittens out very close to but not including the selvedge edge. Cut the remaining fabric into 8 - 2½" x width of fabric binding strips . This will result in a few strips being a little shorter. That's okay...we have enough. Continue making the block as described above.
Designs 23, 29, 30 and 35
These designs are little harder to handle. Follow the tracing and cutting as explained above. Did you notice that the designs are in the reverse!
Peel away and fold back the paper a small amount from the top.

Place the design in position and carefully pull down the paper.

In the case of the "N", both tops need to be anchored before pulling down each side. Note: I have used Black Cookbook fabric. It should be Black Sugary Snow Dots fabric.


What sized blanket stitch for outlining pls?
If you have bought a kit then use the fabric listed in the pattern. I have used what I had on hand.
I like creative liciense but do not want to not have the correct amont of fabric when we need it later. The fabric pattern shows using Black Sugary Snow Dots for the letters SNOW, but you are recomending Black Vinage Cook Book. If we use the Black Vinage Cook Book, will we have enough of it for later???
Be creative! You are not locked into the fabric colours shown on the cover. Those mittens don’t have to be gingham, nor the bowls red. What a great chance to “Stash Dive”!
Note: the designer cuts her binding on the bias. As I don’t like so many seams, I cut my binding ‘width of fabric’. The choice is yours.